
Embroidery patches are versatile and stylish accessories that can add a unique touch to clothing, bags, hats, and more. Making your own custom embroidery patches is not only a fun and creative endeavor but also allows you to express your personal style. In this article, we'll guide you through the process of making embroidery patches using your embroidery machine, all while considering the role of embroidery digitizing companies like zDigitizing and vector art services in enhancing your designs.
Preparing for Your Embroidery Patch Project
Before diving into the embroidery process, it's essential to gather the necessary supplies and plan your project:
1. Embroidery Machine
You'll need an embroidery machine to create patches. Ensure your machine is in good working condition and compatible with the size and type of patches you plan to make.
2. Stabilizer
Stabilizer is crucial for maintaining the stability of your fabric during the embroidery process. Use the appropriate stabilizer based on the type of fabric you're embroidering on. Cut the stabilizer to match the size of your hoop.
3. Fabric
Choose the fabric for your patches. Common choices include felt, twill, or canvas. Ensure the fabric is clean and free from wrinkles before hooping it.
4. Embroidery Hoop
Select the appropriate embroidery hoop size for your patches. Hoop the stabilizer and fabric together, ensuring it's taut and secure.
5. Embroidery Threads
Choose high-quality embroidery threads in the colors you desire for your patches. Ensure you have enough thread to complete your project.
6. Design Selection
Decide on the design you want to turn into a patch. You can either purchase machine embroidery designs online or create your own. If creating your design, consider the size and complexity to ensure it works well as a patch.
The Role of Embroidery Digitizing Companies
Embroidery digitizing companies play a crucial role in the patch-making process. These companies specialize in digitizing services for embroidery, converting artwork into digital embroidery files. Here's how they contribute to your patch project:
1. Accurate Digitization
Embroidery digitizing companies ensure that your designs are translated accurately into stitch patterns. They consider factors like stitch type, density, and color changes to ensure the design stitches correctly.
2. Customization
Digitizing services allow for customization of your designs. You can request adjustments, resizing, and modifications to ensure that the final patch aligns with your vision.
3. Conversion from Pictures to Embroidery
Embroidery digitizing companies can convert pictures into embroidery-ready files. Whether it's a photograph, artwork, or logo, they can create vector versions suitable for digitization.
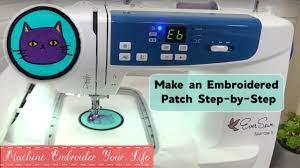
Creating Your Embroidery Patches
Now that you've gathered your supplies and have your digitized design ready, it's time to create your embroidery patches:
1. Hoop and Stabilize
Hoop the stabilizer and fabric with the design centered within the hoop. Ensure the fabric is taut, and the stabilizer is securely in place.
2. Thread the Machine
Thread your embroidery machine with the colors needed for your design. Start with the outline or border of your patch design.
3. Embroider the Outline
Begin the embroidery process, allowing the machine to stitch the outline or border of your patch design. This step defines the shape of your patch.
4. Fill Stitch
After the outline is complete, the machine will move on to the fill stitch, which fills the interior of the patch design with stitches. This step provides color and texture to your patch.
5. Details and Text
If your design includes any details or text, the machine will embroider these elements next. Ensure the thread colors and stitch settings match your design.
6. Final Border
Complete your patch by stitching a final border around the design to secure the edges and give it a finished look.
7. Remove from Hoop
Carefully remove the fabric from the hoop, being cautious not to damage the stitches or fabric.
8. Trim Excess Fabric
Trim any excess fabric and stabilizer from the back of the patch, leaving a clean and tidy finish.
9. Attach Fasteners
Depending on how you plan to use your patches, you may need to attach fasteners like adhesive backing or iron-on backing. These attachments make it easy to affix your patches to various items.
Tips for Successful Embroidery Patches
To ensure your embroidery patch project is a success, consider these tips:
Test Stitch: Always conduct a test stitch-out of your design on a sample fabric before embroidering the final patch.
Choose the Right Fabric: Select a fabric that is suitable for the intended use of your patch, whether it's for clothing, bags, or accessories.
Proper Stabilization: Ensure that you use the right stabilizer and hoop tension to prevent puckering or distortion of the fabric.
Trim Carefully: When trimming excess fabric and stabilizer, use sharp scissors and take your time to achieve clean edges.
Quality Thread: Use high-quality embroidery thread to ensure vibrant and long-lasting colors.
Conclusion
Creating custom embroidery patches with your embroidery machine is a rewarding and creative endeavor that allows you to add a personal touch to your clothing, accessories, and more. With the right supplies, a well-digitized design, and attention to detail, you can produce professional-quality patches that reflect your unique style and vision.
Embroidery digitizing companies like zDigitizing play a crucial role in the patch-making process by ensuring that your designs are accurately converted into machine-readable formats. Their expertise in digitization ensures that your patches stitch correctly and look exceptional.
Whether you're crafting patches for personal use, as part of a small business, or to share your creativity with others, the art of creating custom embroidery patches is a delightful journey that blends craftsmanship with technology. With your embroidery machine as your canvas and the support of digitization services, you can turn your designs into tangible, wearable expressions of your creativity. So, gather your supplies, select your favorite designs, and embark on a patch-making adventure that will leave you with unique and stylish creations.