
Introduction
The clutch is an essential component of any manual transmission vehicle, as it allows you to smoothly engage and disengage power from the engine to the wheels. Over time, clutches can wear out and require replacement. If you're a DIY enthusiast or looking to save money on mechanic fees, this step-by-step guide to clutch replacement in Maidstone will help you get the job done.
Tools and Materials
Before you begin, gather the necessary tools and materials for the job. You'll need:
- A car jack and jack stands
- Wrenches and socket set
- Screwdrivers
- Torque wrench
- Clutch kit (including a clutch disc, pressure plate, and release bearing)
- Transmission jack (optional but recommended)
- Brake fluid
- Transmission fluid (if necessary)
- Engine hoist (for more complex jobs)
Safety First
Always prioritize safety when working on your vehicle. Ensure your car is parked on a flat, stable surface, and engage the parking brake. Chock the wheels to prevent any accidental movement. Additionally, wear appropriate safety gear such as gloves and safety glasses.
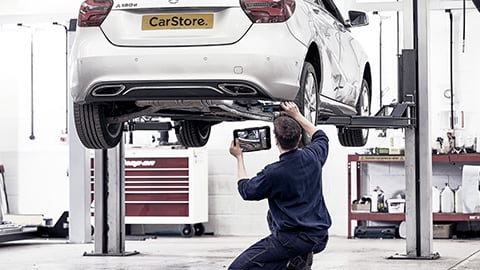
Step 1: Raise the Vehicle
Use a car jack to lift the front of your vehicle and secure it with jack stands. This will provide ample space to access the clutch components.
Step 2: Remove the Transmission
To access the clutch assembly, you'll need to remove the transmission. Begin by disconnecting the battery to avoid any electrical hazards. Then, remove the driveshaft, starter, and any other components obstructing access to the transmission.
Step 3: Disconnect the Clutch Components
Disconnect the hydraulic line from the clutch master cylinder and unbolt the clutch slave cylinder from the transmission. Remove the bolts securing the transmission to the engine, and carefully lower the transmission using a transmission jack if available.
Step 4: Replace the Clutch Components
With the transmission removed, you can access the clutch components. Start by removing the bolts securing the pressure plate to the flywheel. Once removed, take out the old pressure plate, clutch disc, and release bearing.
Install the new clutch disc, making sure it's properly aligned. Next, attach the new pressure plate, ensuring it's correctly aligned with the flywheel. Tighten the bolts in a crisscross pattern to evenly distribute pressure. Consult your clutch kit's instructions for specific torque values.
Step 5: Reconnect the Transmission
Lift the transmission back into place using the transmission jack if you have one. Reconnect the transmission to the engine and tighten the bolts. Reinstall the driveshaft, starter, and any other components previously removed.
Step 6: Bleed the Clutch
If your vehicle has a hydraulic clutch system, you'll need to bleed the system to remove any air bubbles. This ensures proper clutch engagement. Follow the manufacturer's instructions for bleeding the clutch, and top up the brake fluid reservoir as needed.
Step 7: Test Drive
Before completing the job, take your vehicle for a test drive to ensure the clutch is working correctly. Pay attention to how it engages and disengages, and make any necessary adjustments.
Conclusion
Clutch replacement in Maidstone can be a challenging but rewarding DIY project. With the right tools, materials, and this step-by-step guide, you can save money on mechanic fees and gain a sense of accomplishment from successfully replacing your clutch. However, if you're unsure of your mechanical skills, it's always wise to consult a professional mechanic to ensure the job is done safely and correctly.
Read more about MOT MY VAN Aldershot