
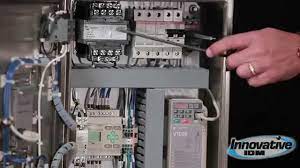
Electrical control panels are essential components of electrical power systems, providing protection and control to various electrical equipment. These panels are designed to ensure the safety of personnel and equipment, monitor and control electrical circuits, and prevent electrical hazards. However, over time, these panels can accumulate dust, dirt, and debris, leading to various issues that can affect the performance and reliability of the electrical system. Therefore, it is essential to perform spring cleaning of the electrical control panels to keep them in optimal condition. In this article, we will discuss why Live Panel Cleaning is important and how to do it.
Why is Electrical Control Panel Spring Cleaning Important?
Dust, dirt, and debris can accumulate on the electrical control panel components, such as switches, relays, and circuit breakers, affecting their performance and reliability. The accumulation of dust can also cause overheating, leading to equipment failure or even electrical fires. Therefore, it is crucial to perform spring cleaning of the electrical control panels to ensure that they are in optimal condition and to prevent potential hazards.
Another reason why electrical control panel spring cleaning is important is that it can help identify any issues or defects in the electrical system. During the cleaning process, the electrical components are inspected for any signs of wear and tear, corrosion, loose connections, or other defects that may affect the system's performance. Any issues identified can be repaired or replaced before they cause major problems, ensuring the system's reliability.
How to Perform Electrical Control Panel Spring Cleaning
Performing spring cleaning of the electrical control panels is a simple process that can be done in a few steps. Here are the steps involved in cleaning an electrical control panel:
Step 1: Turn off Power Supply
Before performing any cleaning or maintenance on an electrical control panel, it is crucial to turn off the power supply to the panel. This ensures the safety of personnel and prevents any accidental electrical shocks. It is recommended to follow the lock-out/tag-out procedures outlined in the electrical control panel manual to ensure that the power supply is properly shut off.
Step 2: Remove Dust and Debris
The first step in cleaning an electrical control panel is to remove any dust and debris that may have accumulated on the components. This can be done using a soft-bristled brush or a vacuum cleaner with a soft brush attachment. It is important to be gentle while cleaning the components to prevent any damage to them.
Step 3: Clean Electrical Components
After removing the dust and debris, the electrical components can be cleaned using a cloth or a brush. It is recommended to use a lint-free cloth or a soft-bristled brush to avoid damaging the components. It is also important to use a cleaning solution that is suitable for the electrical components being cleaned. For example, if cleaning electrical contacts, a contact cleaner can be used.
Step 4: Inspect Electrical Components
Once the electrical components have been cleaned, they can be inspected for any signs of wear and tear, corrosion, or loose connections. Any issues identified should be repaired or replaced to ensure the system's reliability.
Step 5: Check Electrical Panel Gaskets and Seals
The electrical control panel gaskets and seals should be checked for any signs of wear and tear. If they are damaged, they should be replaced to prevent moisture and dust from entering the panel, which can cause damage to the electrical components.
Step 6: Check Electrical Panel Labels and Markings
The electrical panel labels and markings should be checked to ensure that they are legible and up to date. Any worn or illegible labels should be replaced to ensure that personnel can quickly identify the electrical components and their functions.
Step 7: Close the Electrical Control Panel
After completing the cleaning and inspection process, the electrical control panel should be closed and secured properly. To learn more about PCB repair services touch with us.